Your computer used to fly. When you first pressed that power button, it booted up in seconds. Apps opened instantly. Games ran smoothly. But over time, things changed. Now, you stare at a spinning loading wheel just trying to open a web browser. You press a key and wait for the text to appear. Your machine feels like it is moving through deep mud.
You do not need to buy a brand-new computer to get that original speed back. You also do not need to download sketchy third-party software that promises to clean your system but only slows it down more. Windows has incredibly powerful tools built right into the operating system. These native performance tuning tweaks can breathe new life into your machine. Let us dive right in and unlock the hidden power of your PC.
Take Control of Your Startup Programs
Every single time you turn on your computer, a massive group of programs wakes up behind the scenes. Some of these programs are necessary, like your security software. Many others are selfish. They decide that they are important enough to run constantly, even if you only use them once a month.
When dozens of apps try to launch at the same moment you boot your PC, your processor and memory choke. This creates a massive traffic jam that slows down your entire experience from the very first second.
How to Use the Task Manager for Startup Control
To fix this traffic jam, you need to use a built-in tool called the Task Manager. You can open this tool easily by pressing three keys at the same time: Control, Shift, and Escape.
Ctrl + Shift + Esc -> Task Manager -> Startup Apps
Once the Task Manager opens, look for the tab or icon that says Startup Apps. Here, you will see a list of every single program that has permission to start up with your computer.
- Analyze the Impact: Look at the column labeled Startup Impact. Windows tells you exactly how much energy and time each app steals during bootup (High, Medium, or Low).
- Disable the Culprits: Right-click on any program that you do not need immediately when your PC turns on and select Disable.
- Be Careful: Do not disable things like audio drivers, wireless network controllers, or antivirus programs. Stick to disabling apps like game launchers, chat programs, and cloud storage links that you can easily open manually later.
Why This Tweak Changes Everything
By stopping these apps from launching automatically, you free up massive amounts of system memory, also known as RAM. Your computer boots up much faster because it only has to focus on loading the core Windows files. This single tweak can cut your boot time in half if you have a lot of cluttered software running in the background.
Adjust Visual Effects for Maximum Performance
Windows looks beautiful. It features smooth animations, transparent windows, soft shadows under your mouse cursor, and sliding menus. While these visual designs look nice, they require a lot of processing power. Your graphics card and processor must work constantly just to draw these pretty animations on your screen.
If you have an older computer or a budget laptop, these visual effects act like a heavy weight holding your system back. You can trade these unnecessary animations for pure, raw speed.
Accessing Advanced System Settings
To change how Windows looks, you need to find the Performance Options menu.
- Press the Windows Key on your keyboard and type “appearance” into the search bar.
- Click on the option that says “Adjust the appearance and performance of Windows.”
- A small window will pop up with a list of checkboxes.
Customizing Your Visual Experience
Inside this menu, you will see four main choices at the top. The fastest option is to click the circle next to “Adjust for best performance.” This instantly unchecks every single visual detail, turning off animations and shadows.
If you find that the fonts look a bit too jagged after doing this, you can choose a custom approach. Leave the following two options checked to keep the text looking clean while saving maximum power:
- Smooth edges of screen fonts: This keeps your words looking crisp and readable.
- Show thumbnails instead of icons: This lets you see tiny previews of your pictures in folders instead of generic icons.
Once you click apply, your windows will snap open instantly. There will be no sliding, fading, or shrinking animations. Your computer feels much faster because it no longer wastes time trying to look pretty.
Master the Power Plans
Your computer has built-in energy profiles called Power Plans. These plans act like a speed controller for your processor. By default, most Windows computers are set to a balanced mode. This mode tries to save battery life and reduce electricity use by slowing down your processor when you are not doing heavy work.
While saving energy is good, the balanced plan can sometimes be too cautious. It might hold your computer back when you want to open a heavy app or load a web page quickly.
Switching to High Performance Mode
You can tell Windows that you care more about speed than saving a tiny bit of electricity.
- Press the Windows Key and type “control panel” then press Enter.
- In the search box of the Control Panel, type “power options” and click on it.
- You will see your current plan. Click the small arrow next to “Show additional plans.”
- Select the bubble for High Performance.
The Ultimate Hidden Plan: Ultimate Performance
If you are using a high-end desktop computer that is always plugged into the wall, you might have access to a secret plan called Ultimate Performance. This plan eliminates every microsecond of delay by keeping your processor running at its maximum ready speed at all times.
If you do not see it, you can unlock it using the built-in Windows PowerShell. Right-click your start button, select Windows Terminal (Admin) or PowerShell (Admin), paste the following code, and hit enter:
powercfg -duplicatescheme e9a42b02-d5df-448d-aa00-03f14749eb61
Go back to your Power Options menu, and this new supercharged plan will be available for you to select. This ensures your hardware never goes to sleep when you need it most.
Clean Up Storage with Storage Sense
Think of your computer storage drive like a real-world desk. If your desk is piled high with old papers, empty soda cans, and random boxes, it takes you much longer to find the tool you actually need to do your work. A crowded hard drive slows down your computer because Windows constantly struggles to find space to write new temporary files.
Windows includes a built-in digital janitor named Storage Sense that automates the cleaning process.
Activating Your Digital Janitor
Storage Sense monitors your system and automatically throws away garbage files that you do not need anymore.
- Open your Settings app by pressing the Windows Key and clicking the gear icon (or pressing Windows Key + I).
- Click on System, then click on Storage.
- Toggle the switch for Storage Sense to the “On” position.
Configuring Storage Sense for Maximum Cleanup
Clicking on Storage Sense allows you to customize how often it cleans. You can set it to run every day, every week, or every month. You can also tell it to automatically delete files in your Recycle Bin that have been sitting there for more than thirty days.
This tool also targets your temporary files folder. When you surf the web or install apps, files are created for temporary use and then forgotten. Storage Sense wipes these out, instantly clearing gigabytes of space without touching your personal photos, documents, or games.
Uninstall Bloatware and Unused Apps
When you buy a computer, it often comes preloaded with software you never asked for. This includes trial antivirus programs, random casual games, and manufacturer utilities that you do not need. This unwanted software is called bloatware.
Even apps you downloaded yourself months ago might be sitting in the background, consuming storage space and system resources.
The Right Way to Remove Apps
Do not just delete the folder containing an app. That leaves behind scattered registry entries and hidden files. Instead, use the official built-in uninstaller tool.
- Open your Settings menu (Windows Key + I).
- Go to Apps and then click on Installed apps.
- Scroll through the list slowly. Look for apps you do not recognize or no longer use.
- Click the three dots next to the app and select Uninstall.
What to Look Out For
Be aggressive with games you no longer play and older web browsers you do not use. However, leave programs made by companies like Intel, AMD, NVIDIA, or Realtek alone, as these run your graphics, processing, and sound hardware. Removing unnecessary apps clears up space and prevents hidden background services from dragging down your performance.
Optimize and Defragment Your Storage Drives
Your computer uses one of two types of storage: a traditional Hard Disk Drive (HDD) with spinning metal platters, or a modern Solid State Drive (SSD) which uses fast flash memory chips. Both types of drives need regular maintenance, but they need to be handled differently.
Windows has a single tool that handles both types perfectly called “Defragment and Optimize Drives.”
| Drive Type | What the Tool Does | Why It Helps |
| Hard Disk Drive (HDD) | Defragmentation | Gathers pieces of files scattered across the spinning disk and puts them close together so the drive head reads them faster. |
| Solid State Drive (SSD) | TRIM Command | Tells the drive which blocks of data are no longer needed so the drive can wipe them clean for future writing. |
Running the Optimization Tool
Windows usually runs this tool automatically, but doing it manually after a big cleanup helps organize your drive immediately.
- Type “defragment” into your Windows search bar.
- Click on Defragment and Optimize Drives.
- Select your main drive (usually the C: drive) and click Analyze to see its status.
- Click Optimize to start the process.
For an HDD, this might take a few hours if it has never been done before. For an SSD, it takes only a few seconds. Running this ensures that your system reads and writes files at top speed.
Disable Resource Intensive Background Apps
Many apps have permission to talk to the internet, update their data, and send you notifications even when you do not have their windows open. A messaging app might constantly check for new notes, or a weather app might update its temperature map every five minutes.
If twenty apps do this simultaneously, your processor never gets a chance to rest, leading to high temperatures, loud cooling fans, and slower overall response times.
Turning Off Background Permissions
You can choose exactly which apps are allowed to run when you are not looking at them.
- Open Settings and head to Apps, then Installed apps.
- Find an app that you do not need running in the shadow of your system.
- Click the three dots and look for Advanced options.
- Find the section named Background apps permissions.
- Change the dropdown menu from “Always” or “Power optimized” to Never.
By setting non-essential apps to “Never,” you ensure they only use your computer resources when you actively double-click them to open them. The rest of the time, they remain completely frozen and harmless.
Run the Built-In Windows Malicious Software Removal Tool
Sometimes, a slow computer is not your fault. It could be caused by hidden malware or unwanted scripts running silently. These malicious files steal your computer memory and network speed to send spam, mine digital currency, or steal data.
While you might have a standard antivirus running, Windows contains a secondary hidden scanner designed specifically to target deep system threats.
Opening the Secret Scanner
This tool does not have a standard shortcut icon in your start menu. You must summon it using the Run box.
- Press the Windows Key and the R key at the exact same time to open the Run window.
- Type
mrtinto the box and press Enter. - Click “Yes” when the system asks for administrator permission.
Windows Key + R -> Type "mrt" -> Press Enter
Choosing Your Scan Type
The Malicious Software Removal Tool will open with a welcome screen. Click next, and you will see three options: Quick scan, Full scan, and Customized scan.
- Quick Scan: Checks the most common folders where malware hides. This takes just a few minutes.
- Full Scan: Scans every single corner of your hard drive. This can take several hours but is highly thorough.
Choose the Full Scan before you go to bed. If it finds any hidden tracking tools or malicious scripts, it will wipe them out completely, instantly freeing up your hijacked processor power.
Clean Up the Windows Registry
The Registry is the massive internal brain database of Windows. It holds configuration settings for your desktop wallpaper, your app preferences, your mouse speed, and everything else. When you install and uninstall software, old configuration lines get left behind. Over years of use, the registry can become bloated with thousands of broken links and empty keys.
Cleaning this manually is dangerous because deleting the wrong line can damage your system. Instead, you can use built-in system repair utilities to safely fix registry errors.
Using Deployment Image Servicing and Management (DISM)
Windows features an advanced command-line tool that compares your current system files and registry structures with a fresh, official version from the cloud. It replaces any broken or corrupt data automatically.
To run this tool:
- Type “cmd” into your Windows search bar.
- Right-click on Command Prompt and choose Run as administrator.
- Type the following line exactly and hit Enter:
DISM.exe /Online /Cleanup-image /Restorehealth
Your computer will connect to the internet to verify your system health. It might look like it is stuck at twenty percent for a while, but let it finish. It is reorganizing your core internal database.
Running the System File Checker
Immediately after the DISM tool finishes, type this second command in the same black window and hit Enter:
sfc /scannow
This utility scans every single system file on your PC. If it finds an error in how an app communicates with your system registry, it heals the file instantly. Once both tests finish, restart your machine to apply the core structural repairs.
Optimize Your Virtual Memory (Paging File)
Your computer uses its physical memory (RAM) to hold active files. If you open too many web browser tabs and games at the same time, your RAM can run completely out of space. When this happens, Windows uses a trick called Virtual Memory. It takes a chunk of your storage drive and pretends it is RAM, moving idle files into this space.
By default, Windows manages this size automatically. However, if your hard drive fragments this file, your computer will stutter whenever it switches between apps. You can set a fixed size for this virtual memory to prevent stuttering.
Locating Virtual Memory Settings
- Open the Control Panel and select System and Security, then click on System.
- Click on Advanced system settings on the right side of the window.
- Under the Advanced tab, look for the Performance section and click Settings.
- Move to the Advanced tab inside this new window and click the Change button under Virtual Memory.
Setting the Perfect Size
Uncheck the box at the very top that says “Automatically manage paging file size for all drives.” Click on your main drive, and select Custom size.
You need to know how much real RAM your computer has. You can check this in the Task Manager performance tab. Use this math formula to calculate the ideal initial and maximum sizes:
- Initial Size: Multiply your total RAM by 1.5.
- Maximum Size: Multiply your total RAM by 3.
$$\text{Initial Size} = \text{Total RAM} \times 1.5$$
$$\text{Maximum Size} = \text{Total RAM} \times 3$$
For example, if your PC has 8 Gigabytes of RAM (which is 8192 Megabytes):
- Initial size should be set to 12288 MB.
- Maximum size should be set to 24576 MB.
Click Set, then click OK, and restart your computer. By fixing this size, Windows no longer has to constantly shrink and grow this file, which stops random performance dips during heavy work.
Pause or Adjust Windows Update Schedules
Windows Updates are incredibly important for keeping your machine safe from new security risks. However, Windows has a habit of downloading these massive system updates right when you are trying to do important work or play an intense online game. This causes sudden slow downs as your internet connection and storage drive get maxed out.
You can take control of when these updates happen so they never disrupt your system flow.
Scheduling Updates Around Your Life
- Open your Settings window (Windows Key + I).
- Click on Windows Update in the sidebar.
- Look for the option called Active hours.
Change this setting to Manual. Tell Windows exactly what time you start using your PC and what time you turn it off. For example, if you use your computer from 8:00 AM to 10:00 PM, set those as your active hours. Windows will promise never to install updates or restart your computer during those hours.
Pausing Updates During Critical Work
If you are experiencing a slow network connection and suspect Windows is downloading files, you can click the Pause updates for 1 week button. This halts all update downloads instantly, giving you full access to your network and hardware speeds until you are ready to update manually.
Clear Your Delivery Optimization Cache
To help people download updates faster, Windows uses a system called Delivery Optimization. This feature turns your PC into a miniature server. It shares parts of updates you have already downloaded with other random computers on your local network or even across the internet.
While this helps the community, it steals your upload internet speed and leaves massive cache files sitting on your system storage drive for months.
Turning Off Peer Sharing
You can stop your computer from sharing files with strangers behind your back.
- Go to Settings, then click on Windows Update.
- Select Advanced options.
- Scroll down and click on Delivery Optimization.
- Turn off the switch that says Allow downloads from other PCs.
Cleaning the Leftover Cache Files
Once you turn this off, you can throw away the leftover files that were waiting to be shared. Go back to your Storage menu in Settings, click on Temporary files, check the box for Delivery Optimization Files, and click Remove files. This instantly wipes out gigabytes of useless, hidden data blocks.
Disable System Notifications and Tips
As you use Windows, helpful tips occasionally pop up in the corner of your screen. The system might suggest new ways to set up your account or give you advice on how to use a feature. To provide these recommendations, Windows runs a tracker that continuously analyzes your actions.
Turning off these tips reduces the minor background tasks your processor has to track.
Silencing the Suggestions
- Open the Settings menu.
- Go to System and select Notifications.
- Scroll down to the very bottom of the page and expand the Additional settings section.
- Uncheck the box that says “Offer suggestions on how I can set up my device.”
- Uncheck the box that says “Get tips and suggestions when I use Windows.”
Your system will feel cleaner, and your processor will no longer waste processing power watching your movements just to show you tips.
Keep Your Hardware Drivers Updated Natively
Your hardware parts, like your graphics card, network adapter, and audio chip, require special software instructions to talk to the Windows operating system. These instructions are called drivers. If your drivers are outdated, your hardware might run inefficiently, leading to dropped frames in games, slow internet connection drops, and random blue screen crashes.
You do not need to visit messy third-party websites to update drivers; you can fetch them directly through official Windows paths.
Using Device Manager for Driver Updates
The Device Manager lists every electronic piece connected to your PC motherboard.
- Right-click the Windows Start button and select Device Manager.
- Expand the section for the hardware you want to check (for instance, Display adapters for your graphics card).
- Right-click your hardware component and select Update driver.
- Choose Search automatically for drivers.
Right-Click Start -> Device Manager -> Right-Click Component -> Update Driver
Checking for Optional Quality Updates
Sometimes, hardware manufacturers send updates directly to Windows Update, but Windows marks them as optional so they do not install automatically.
To check for these, go to Settings, then Windows Update, and click Advanced options. Look for Optional updates. If you see a list of driver updates here, check all the boxes and click download. These official updates often resolve bugs that cause hardware lag.
Frequently Asked Questions
Will doing these tweaks delete my personal documents or photos?
No, none of these native performance tweaks will touch your personal files. Tools like Storage Sense and the Temporary Files cleaner are specifically programmed to target background system trash, old web page caches, and leftover installation data blocks. Your photos, text documents, saved games, and downloaded movies are completely safe.
How often should I optimize and defragment my hard drive?
If you have a traditional spinning Hard Disk Drive (HDD), running the optimization tool once every month is an excellent habit. If your computer uses a modern Solid State Drive (SSD), you do not need to worry about it as often because Windows runs the TRIM command automatically in the background every week to keep it healthy.
Is it safe to disable all startup programs in the Task Manager?
It is safe to disable apps that you recognize, such as game storefronts, communication tools, and music players. Disabling them simply means they will not open by themselves when the PC turns on. However, avoid disabling items that mention audio drivers, security shields, or motherboard controllers, as these keep your hardware working smoothly.
Why does my computer still feel slow after changing the power plan to high performance?
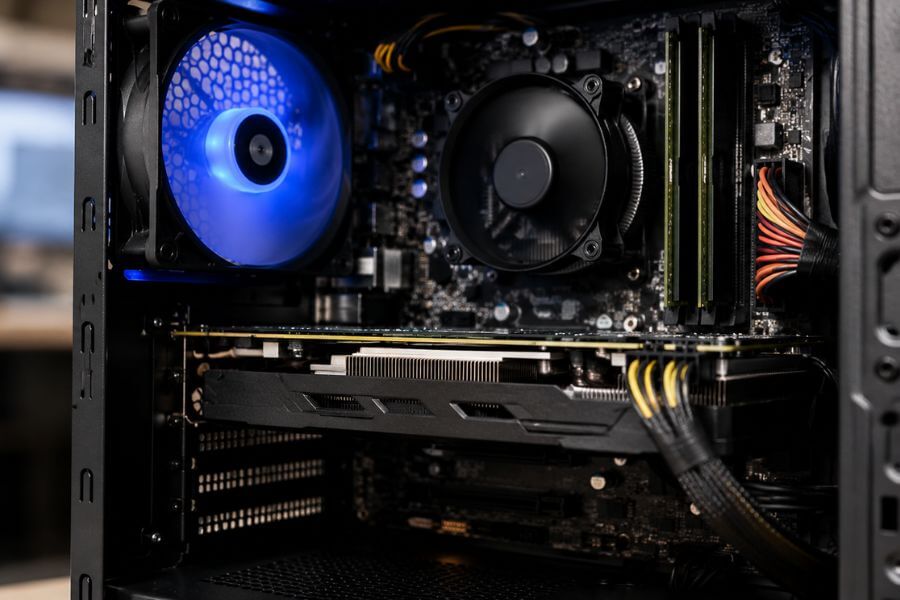
If your computer remains incredibly slow after applying all these adjustments, your storage drive might be failing, or your system might be overheating due to dust inside the physical case. If your PC is using an older HDD as its main operating drive, upgrading that single physical part to a modern SSD will provide a massive speed jump that software tweaks alone cannot achieve.
Will turning off visual effects make my computer look ugly?
Turning off visual effects will make your windows look a bit more basic. Windows will lose its transparency, and menus will snap open instantly instead of sliding smoothly. However, the text fonts will remain sharp and easy to read if you leave the “Smooth edges of screen fonts” option checked. Most users quickly get used to the snappier look because the speed gain is worth it.


