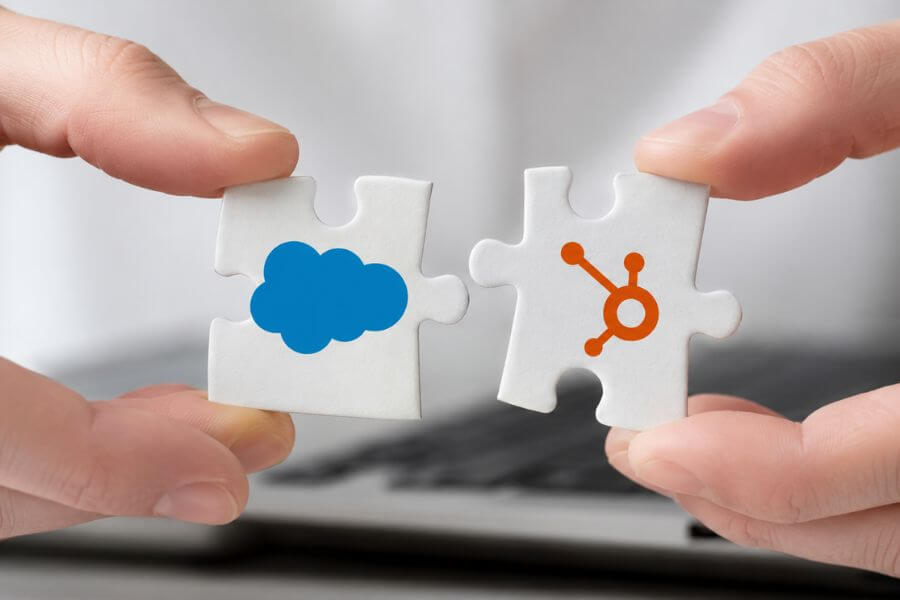
Imagine having a team where the left hand always knows exactly what the right hand is doing. In the world of business, Salesforce is often that right hand, managing deep customer relationships, while HubSpot acts as the left hand, guiding marketing campaigns. But when these two systems do not talk to each other, things get messy.
You might find yourself typing the same customer name into both systems, or missing a massive update because it was saved in one app but not the other. This guide shows you exactly how to build a digital bridge between Salesforce and HubSpot using Zapier Webhooks. By the time you finish reading, your data will flow instantly from one side to the other without you lifting a finger.
Why Custom Webhooks Matter For Your Tech Stack
Most software platforms come with built-in tools to connect with other apps. Salesforce and HubSpot actually have a native integration that you can turn on with a few clicks. So, you might wonder why anyone would go through the trouble of building a custom pipeline using webhooks.
The truth is that standard connections are like public buses. They run on a set schedule, stop only at specific places, and carry a pre-determined amount of luggage. A custom webhook pipeline is like a private sports car. It moves the exact data you want, the very second you want it to move, and can take shortcuts that the public bus simply cannot access.
The Limits of Native Integrations
Native integrations usually operate on a fixed schedule or look at a very rigid set of data rules. For example, the standard Salesforce and HubSpot link might sync your contacts every ten minutes. In a fast-moving business, ten minutes can feel like an eternity. If a customer fills out a form on your website, they want a phone call within two minutes, not ten.
Furthermore, native tools often struggle with custom data fields. If you created a special category in Salesforce called “Favorite Ice Cream Flavor,” the standard HubSpot tool might not know how to read that information. Webhooks do not care about standard rules. They carry any data you label, allowing you to move unique details effortlessly between platforms.
What is a Webhook Anyway
Think of a traditional software connection as a person constantly calling a friend to ask, “Do you have any news yet? How about now? What about now?” This method is called polling, and it wastes a massive amount of energy and computer power.
A webhook flips this relationship around. Instead of constantly checking for updates, one app sits quietly until something exciting happens. The moment a new event occurs—like a customer buying a product—the app instantly sends a text message to the other app saying, “Hey, this just happened, here are the details!” It is an instant, automatic alert system that triggers actions across the internet.
Why Zapier Rules the Middle Ground
Zapier acts as the ultimate translator in this scenario. Even though webhooks are incredibly powerful, they usually require you to write complex lines of computer code to catch and read the messages. Zapier removes the need for coding entirely. It gives you a clean visual dashboard where you can catch a webhook from Salesforce, unpack the information inside it, change the format if needed, and stuff it directly into HubSpot. It turns a difficult software engineering task into a simple puzzle that anyone can solve.
The Pre-Flight Checklist Before You Begin
Before you start clicking buttons and building your pipeline, you need to gather your tools. Trying to build an integration without the right accounts is like trying to bake a cake before buying the ingredients. Taking five minutes to prepare right now will save you hours of confusion later.
Your Salesforce Settings
To use webhooks with Salesforce, you need an account that allows API access. This usually means you need the Enterprise, Performance, or Unlimited version of Salesforce. If you are using a basic or starter package, Salesforce blocks external tools from reading your data automatically.
You also need administrative privileges. If you are a standard user, you will not be able to create the triggers needed to send information out of the system. Log into your dashboard and verify that you can see the Setup menu.
Your HubSpot Hub
On the HubSpot side, you need an account that supports custom properties and workflow automation. While HubSpot offers great free tools, the ability to accept deep, automated data often requires an Operations Hub or a Professional tier subscription.
You should also make sure you have the permissions to create new contact properties. If your account restricts you from modifying how customer data is stored, Zapier will not be able to deliver the information to the correct folders.
The Zapier Premium Account
Webhooks are considered a premium feature by Zapier. This means you cannot build this specific pipeline on their free plan. You will need a Webhooks by Zapier subscription, which comes with their paid tiers.
Make sure your account has enough task volume space as well. If your business handles thousands of new leads every single day, each of those leads will count as a task in Zapier. Ensure your monthly plan can handle the size of your business operations.
Step One: Creating Your Webhook Catching Hook in Zapier
Our journey begins in the middle of the bridge. We need to create the destination where Salesforce will send its instant data messages. Zapier refers to this specific destination as a catching hook.
Starting a New Zap
Log into your Zapier account and look for the large button that says “Create Zap” in the top-left corner of your dashboard. Clicking this opens up a blank canvas where you will design your automation step-by-step.
Your very first task is to name your project. Click on the text in the top corner and title it something descriptive like “Salesforce to HubSpot Instant Pipeline.” This prevents confusion later when you have dozens of active automations running at the same time.
Choosing the Trigger App
Look at the menu for your first step, which is always labeled as the Trigger. In the search box, type the word “Webhooks.” You will see an icon pop up called “Webhooks by Zapier.” Click on it.
[Trigger] Webhooks by Zapier -> [Action] HubSpot Destination
By choosing this instead of the standard Salesforce app, you are bypassing the normal, slower connection rules and telling Zapier to prepare for an instant, direct message from the internet.
Setting Up the Catch Hook Event
Once you select Webhooks by Zapier, a dropdown menu will ask you to choose an event. Select the option that says “Catch Hook.”
There are other choices available, such as “Catch Raw Hook,” but you want the standard version. The standard Catch Hook tells Zapier to automatically organize the incoming data into a clean, readable list of names, numbers, and dates, saving you the trouble of sorting through messy blocks of computer text later.
Copying Your Unique URL
After you click continue, Zapier will generate a long web address that looks like a jumble of random letters and numbers. This is your unique Webhook URL. It acts like a private digital mailbox made specifically for your business.
Click the copy button next to this URL and save it to a temporary notepad file on your computer. You will need to hand this exact address to Salesforce in the next phase so it knows exactly where to send its data payloads.
Step Two: Configuring Salesforce to Send the Data
Now that your digital mailbox is wide open and waiting in Zapier, you need to instruct Salesforce to start mailing packages to it whenever something important happens. We will do this by setting up an outbound message or an apex trigger, depending on how your specific Salesforce dashboard is built.
Navigating the Setup Menu
Log into Salesforce and click on the gear icon located in the upper-right corner of your screen, then select “Setup.” This takes you behind the scenes of your customer database.
On the left side of the screen, you will find a quick-find search bar. Type the word “Flow” into this bar. Flows are the internal automated paths that Salesforce uses to perform actions when specific rules are met. Click on the “Flows” option under the Process Automation header.
Building a Record-Triggered Flow
Click the button that says “New Flow.” You will be presented with several options for how your automated path should begin. Select “Record-Triggered Flow” and hit create.
This option ensures that the moment a specific record is modified—like a salesman updating a lead from “Cold” to “Hot”—the system instantly jumps into action. It functions as the ultimate listening tool inside your database.
Selecting Your Object and Setting Rules
Now you must choose which specific folder Salesforce should watch. For this guide, we will monitor the Lead folder. In the Object box, type “Lead.”
Next, tell the system to trigger when a record is updated. You can set specific entry conditions so you do not flood Zapier with useless data. For example, set a rule that states the flow should only run when the Lead Status equals “Qualified.” This ensures that only high-quality, ready-to-buy prospects are sent across your data bridge.
| Salesforce Field | Condition Operator | Desired Value |
| Lead Status | Equals | Qualified |
| Is Null | False | |
| Industry | Not Equal To | [Leave Blank] |
Adding the Action Element
Click the small plus sign on your flow canvas to add a new step after your trigger conditions are met. Scroll through the available actions and look for “Outbound Message” or “HTTP Callout.”
If your version of Salesforce supports direct HTTP Callouts inside Flow, paste the unique Zapier URL you copied earlier directly into the endpoint URL field. Select the data pieces you want to send along, such as the lead’s first name, last name, email address, and company name. Save your flow, click the “Activate” button in the top corner, and your Salesforce system is officially primed to send data out into the world.
Step Three: Testing the Salesforce Trigger
An integration should never be turned on live without a proper test run. In this step, we will intentionally trigger our Salesforce flow to ensure that data actually leaves the platform and arrives safely inside your Zapier account.
Creating a Fake Lead
Go back to your main Salesforce user dashboard and navigate to the Leads tab. Click the button to create a brand-new lead.
Give this lead a highly obvious test name so you can identify it instantly later. Name it something fun like “Captain Test Pipeline” and use a fake email address like captaintest@example.com. Fill out all the fields that you marked as mandatory in your earlier flow setup, including the industry and company fields.
Forcing the Trigger Condition
Remember that your flow only runs when the Lead Status changes to “Qualified.” Find the status dropdown menu on your new fake lead profile.
Change the status from “Open” to “Qualified” and click the save button. The exact microsecond you hit save, Salesforce will run its background rules, realize that “Captain Test Pipeline” meets all your criteria, pack up the contact info, and shoot it directly down the pipeline toward Zapier.
Checking the Mailbox in Zapier
Switch tabs on your browser and return to your Zapier setup screen. Scroll down to the bottom of your Trigger section where you see a button labeled “Test Trigger.” Click it.
Zapier will spend a moment scanning its server to see if any new messages arrived at your unique URL. If everything was set up correctly, the screen will refresh and display the exact information you just typed into Salesforce. You will see “Captain Test Pipeline” and the example email address sitting neatly in a structured list.
Troubleshooting Missing Data
If Zapier says it cannot find a request, do not panic. Check your Salesforce flow to ensure it was actually activated, as saving a flow does not automatically turn it on.
Also, double check that your fake lead matches every single condition you set up. If you missed a required field or misspelled a status name, Salesforce will quietly ignore the record and send nothing. Fix any minor mistakes and press the test button again until the data appears.
Step Four: Transforming Data Layouts to Match HubSpot
One of the biggest hurdles in moving information between different apps is that they use different languages for the same things. Salesforce might call a customer’s phone number “MobilePhone,” while HubSpot calls it “mobile_phone.” Zapier gives you tools to iron out these differences before sending the data to its final destination.
The Problem With Mismatched Formats
If you try to shove raw Salesforce data directly into HubSpot without cleaning it up, things will break. Dates are a classic example of this issue.
Salesforce might write a date as Day-Month-Year, while HubSpot prefers to read dates as Year-Month-Day. If you do not change the format, HubSpot will get confused, reject the incoming package, and throw a frustrating error message.
Utilizing Zapier Formatter
If your data fields match perfectly, you can skip straight to the HubSpot step. But if you need to clean up dates, text, or numbers, click the plus sign below your webhook step and add an action called “Formatter by Zapier.”
[Salesforce Outbound] -> [Zapier Formatter (Clean Text/Dates)] -> [HubSpot Inbound]
This tool acts like an automated editor. You can choose the “Text” option to automatically change lower-case letters into capitalized proper nouns, or use the “Date/Time” tool to convert your time stamps into a format that HubSpot loves.
Trimming Excess Spaces
Another common issue is hidden spacing. Sometimes users accidentally hit the spacebar after typing their email address into a form.
A web system might treat “email@example.com ” as an entirely different text string than “email@example.com”. You can use the Formatter tool to perform a function called “Trim.” This automatically clips away any empty spaces at the beginning or end of your text fields, ensuring clean data enters your system.
Step Five: Designing the HubSpot Action Step
With your Salesforce data captured and neatly formatted by Zapier, you are ready to construct the final leg of the pipeline. This step tells Zapier how to talk to HubSpot and where to place the incoming data.
Connecting Your HubSpot Account
Click the plus sign at the very bottom of your Zap workspace to create a new action step. In the search box, look for “HubSpot” and select the official app icon.
The system will ask you to select an event. Choose “Find or Create Contact.” This specific choice is highly efficient because it prevents duplicate accounts. Instead of mindlessly creating a new contact every time, Zapier will first look to see if the person already exists in HubSpot before making a new record.
Granting Secure Account Permissions
Zapier will prompt you to log into your HubSpot portal via a secure pop-up window. Enter your HubSpot administrative credentials.
The system will ask you to authorize Zapier to view and edit your CRM records. Once you grant this access, your HubSpot account will be safely linked to your Zapier dashboard, allowing the two systems to exchange information behind a wall of modern digital security.
Mapping the Core Identification Fields
Now you need to tell Zapier how to search for existing records. In the “First Search Property Name” box, select “Email.”
In the field right below it, choose the email data piece that arrived from your original Salesforce webhook step. This tells Zapier: “Look inside HubSpot for any contact that shares the email address we just received from Salesforce.”
Filling Out the Remainder of the Contact Profile
Scroll down to the section titled “Create HubSpot Contact if it Doesn’t Exist Yet.” Check the box to activate this feature.
Now, go through each blank box and map it to the corresponding piece of information from your webhook. Click the “First Name” box and select the first name data field from Salesforce. Do the same for the last name, company name, phone number, and lifecycle stage.
| HubSpot Destination Field | Incoming Webhook Source Data |
| First Name | First Name Field from Salesforce |
| Last Name | Last Name Field from Salesforce |
| Email Address | Email Field from Salesforce |
| Phone Number | Mobile Phone Field from Salesforce |
Step Six: Testing and Launching the Complete Pipeline
Your bridge is completely built, the pathways are mapped, and the data conversion rules are set. Now it is time to run a complete, end-to-end test to watch your data move across the entire pipeline.
Sending the Test to HubSpot
Scroll to the bottom of your HubSpot action step and click the button labeled “Test Step.” Zapier will take the fake data from “Captain Test Pipeline” that you pulled from Salesforce earlier, format it according to your rules, and send it straight into your actual HubSpot account.
Verifying the Record in HubSpot
Open up a new tab on your browser and log into your HubSpot dashboard. Navigate to your Contacts menu.
In the search bar, type “Captain Test Pipeline.” If everything went according to plan, you will see a fresh contact profile sitting in your list. Click on it to verify that the phone number, email address, and company name fields match your original Salesforce entry perfectly.
Turning the Switch to Active
Go back to your Zapier tab. Look at the very bottom or top-right corner of your screen for a large toggle switch that says “Publish Zap” or “Turn On Zap.”
Click that switch. Congratulations, your automated pipeline is officially live and working. From this moment on, every single time a lead turns to “Qualified” inside Salesforce, it will instantly blink into existence inside HubSpot without anyone lifting a finger.
Maintenance and Monitoring Your Pipeline
Building an automated system is fantastic, but you cannot simply forget about it forever. Software systems change, fields get updated, and occasionally things go wrong. Proper monitoring keeps your bridge steady over time.
Checking Your Zapier History Log
At least once a week, log into Zapier and click on the “History” tab on your sidebar menu. This area displays a complete log of every single lead that traveled across your pipeline.
You will see clean green checkmarks next to successful transfers. If a transfer fails, you will see a red warning flag. Clicking on that red flag will show you the exact error code so you can quickly figure out what went wrong.
Handling API Overloads
During massive marketing pushes or holiday sales, your business might see a sudden surge in leads. If Salesforce tries to send thousands of webhooks to Zapier at the exact same millisecond, you might experience a brief delay or an API bottleneck.
Keep an eye on your task usage limits to ensure you do not max out your Zapier account mid-month, which could temporarily halt your automated transfers until your billing cycle resets.
Updating Fields When Business Priorities Shift
As your company grows, you will inevitably change the way you track data. If your marketing team decides they want to start tracking a customer’s preferred language or geographic region, you will need to add those fields to Salesforce first.
Once added there, remember to open up your Zapier dashboard, refresh your webhook connection fields, and map those new pieces of information to corresponding fields inside HubSpot. If you forget this step, the old pipeline will keep running smoothly, but the new data categories will be left behind in Salesforce.
Frequently Asked Questions
Will using webhooks create duplicate contact profiles inside my HubSpot dashboard?
No, as long as you configure the HubSpot action step to use the “Find or Create Contact” option. This setting explicitly forces Zapier to search through your entire existing HubSpot database using the email address as a unique anchor before it ever attempts to build a new profile. If it finds a matching email address, it will simply update the existing contact with any new information from Salesforce instead of making a messy duplicate profile.
How much time does it take for a Salesforce update to show up inside HubSpot using this webhook system?
The transfer happens almost instantly. Traditional native connections often rely on background synchronization schedules that run every few minutes or hours. Because webhooks use an instant alert structure, data typically leaves Salesforce, travels through Zapier, and creates a record inside HubSpot in less than three seconds from the moment you hit the save button.
What happens to my data pipeline if the Zapier systems temporarily go down?
If Zapier encounters a brief system disruption, your Salesforce outbound messages will usually queue up or return an error delivery log. High-tier Zapier accounts include an automatic feature called “Autoreplay.” This tool constantly monitors your pipeline for temporary failures caused by system downtimes. The moment connection drops are resolved, Zapier automatically replays the missed webhook messages in chronological order, ensuring zero data is lost.
Can I filter out specific leads in Salesforce so they do not use up my paid Zapier task limits?
Yes, you can control this directly inside your Salesforce Record-Triggered Flow rules. Instead of setting your flow to trigger on every single lead update, use highly restrictive entry conditions. You can instruct Salesforce to only fire the webhook message if the lead contains a corporate email address, belongs to a specific target industry, or reaches a high-priority qualification status, saving your Zapier task allowance for crucial business prospects.


